SpringServe's Direct Connect feature allows you interact taglessly with other SpringServe users. The benefits of migrating from tags to Direct Connect are numerous, and include:
- Reduction in Latency - Because the Direct Connect deals with SpringServe to SpringServe interactions, only a single VPAID needs to be initialized. Reducing the number of VPAIDs that need to be initialized reduces the latency by two to three seconds.
- Control - Applying targeting to your Connected Supply restricts requests sent to your supply. There is no need to confirm with your Direct Connection that they have applied the same targeting on their side. You will also be able to target specific supply tags that your Connected Supply is buying and conversely, you will be able to target specific demand tags that your Connected Demand is selling to.
- Access - Direct Connect allows you to expand your business by directly accessing demand or supply of other SpringServe users.
- Streamlining your business - SpringServe acts as the clearing house for DirectConnect transactions. There is no need to have a separate IO with each of your DirectConnect partners.
Direct Connections
Note that this section is currently hidden in this iteration of the DirectConnect Beta.
When you go to your Direct Connections page, you will see all SpringServe clients that are DirectConnect enabled. The Status column will show one of the following:
- Not Connected - You are not connected, but can send a Direct Connect request to this user by clicking the Connect button in the Actions column. Clicking the button will change the status to Pending (Requested).
- Connected - You are connected and able to create Connected Supply and Demand with this user.
- Pending - This user has sent you a Direct Connect request. Click on View Requests in the Actions column to read through the terms and the message, and accept or reject the request.
- Pending (Requested) - Your request has been sent and is pending approval.
- Rejected - You have rejected a Direct Connect request.
Clicking on the name of the company will show you contact information if it has been provided. To fill in contact information for your account, go to Settings → Basic Settings and fill out the information on the Contact Info tab.
When you have been sent DirectConnect requests by other users, a notification will appear on the DC tab on the top bar. The notification will show as the number of requests that are awaiting your response.

When you have established your Direct Connections, you are ready to set up your Connected Supply and Demand.
Connected Supply
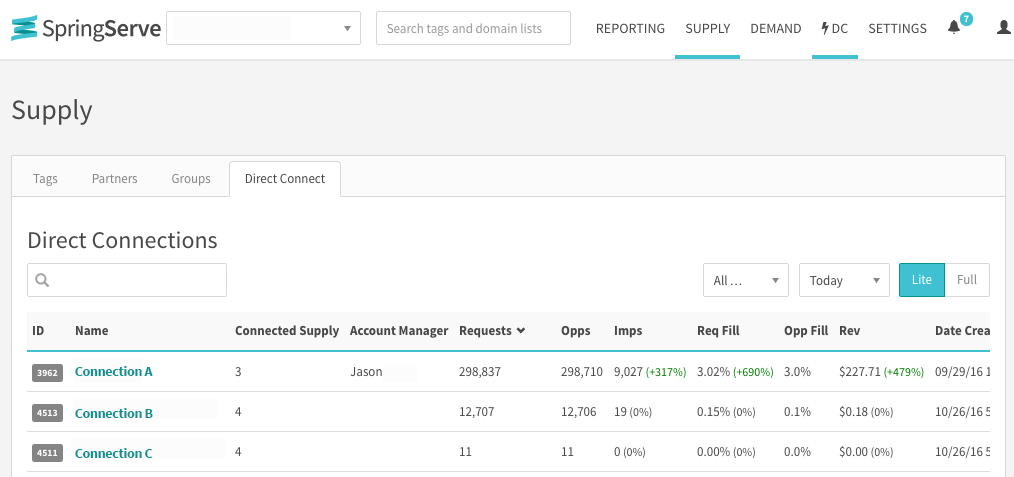
Connected Supply replaces Supply Tags in Direct Connect. In your SpringServe account, go to the Direct Connect tab of the Supply page. Here, you will see all of your existing Direct Connections, the number of Connected Supply objects that you have set up for each connection, and summary performance.
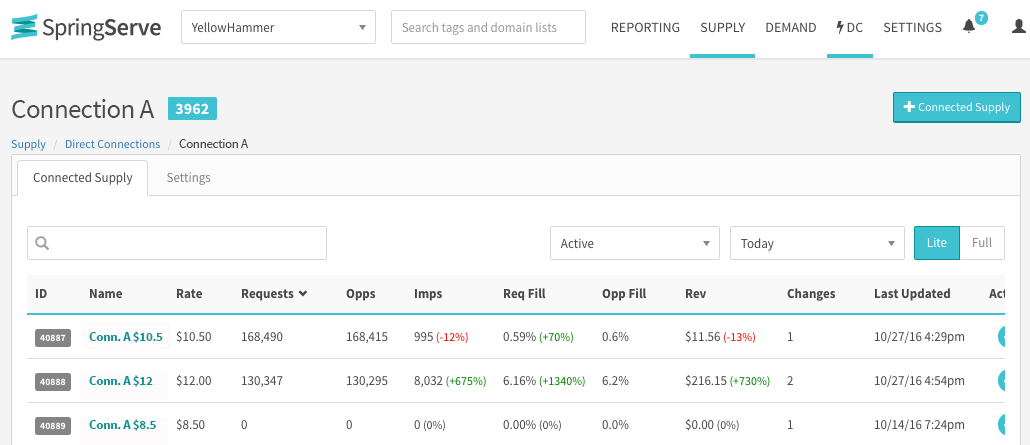
Click on the Direct Connection name to go to your page for that connection. This brings you to the Connected Supply tab, where you will see the information for all of the currently active Connected Supply .
In the settings tab, set your account manager for this connection. You will also see the Direct Connection's set contact information for the account manager on their end.
Creating Connected Supply
Once on the page of a specific Direct Connection, add more Connected Supply by clicking the button +Connected Supply in the top right corner.
In the Settings tab of your new supply, fill in the information.
In the Demand tab, add demand tags and/or Connected Demand to your Connected Supply. This is the demand that will be directly accessing the inventory from your Direct Connection. Click the +Demand and a modal will appear with your Demand. Check the boxes next the Demand that you would like to add and click Add Demand.
As with your Supply Tags, you can either manually set the waterfall in your Connected Supply or you can use auto-optimization. The Optimization tab allows you to choose the type of auto-optimization (or to disable auto-optimization) the same as you would with a Supply Tag.
In the Targeting tab, as with Supply Tags, you can target based on Domain, Size, Device, OS, and Country. Additionally, you can apply Supply Tag Targeting, where you can create a white list or black list of your Direct Connection's supply tag IDs. This feature allows you to target tags that are performing well and optimize against those which are performing poorly.When you set targeting on your Connected Supply, only those requests that pass targeting will come through the Direct Connection. This feature reduces your ad-operations load, because you will not have to confirm with your partners that they have updated targeting on their side.
When you Create a Connected Supply object, the corresponding Connected Demand object will appear in your Direct Connection's account. Once your Direct Connection aligns their Connected Demand to supply in their account, you will see traffic coming through your Connected Supply.
Connected Demand
Connected Demand replaces Demand Tags in Direct Connect. In your SpringServe account, go to the Direct Connect tab of the Demand page. Here, you will see all of your existing Direct Connections, the number of Connected Demand objects that have been set up for each connection, and summary performance. Note that Connected Demand appears in your account when your Direct Connection creates Connected Supply in their account.
Click on the Direct Connection name to go to your page for that connection. This brings you to the Connected Demand tab, where you will see the information for all of the currently active Connected Demand.
On the Connected Demand tab, click on a demand name to see and edit the Connected Demand. In the settings tab of your Connected Demand, any information except for the rate can be edited. The rate is tied to the rate of the corresponding Connected Supply, which is defined by your Direct Connection.
On the Supply tab, add supply tags and/or connected supply to your connected demand. This is the supply that will be directly accessing the inventory from your Direct Connection. Click the +Supply and a modal will appear with your Supply. Check the boxes next the Supply that you would like to add and Click Supply.
As with your Demand Tags, you can add Targeting to your Connected Demand on Domain, Player Size, device, OS, Geo, and Budgeting. Additionally, you can apply Demand Tag Targeting, where you can create a white list or a black list of your Direct Connection's demand tag IDs. This feature allows you to target tags that are performing well and optimize against those which are performing poorly.
In the settings tab, set your account manager for this connection as well as the default tier for any Connected Demand that you align to supply in your account. You will see the Direct Connection's set contact information for the account manager on their end.
Aligning your Connected Demand to Supply in your account will immediately start sending volume to the Connected Supply in your Direct Connection's account.